
If your business still creates invoices from scratch every time a customer places an order, you are spending time on work that Odoo can handle automatically. This guide walks you through creating customer invoices directly from confirmed sales orders in Odoo Accounting.
By the end, you will know how invoicing policies work, when lines become invoiceable, and how to generate invoices in bulk.
Odoo links your sales workflow directly to accounting. When you confirm a sales order, the system tracks which lines are ready to invoice based on your invoicing policy. This means:
Odoo uses two invoicing policies that determine when a sales order line becomes invoiceable:
| Policy | When the Line Becomes Invoiceable | Best For |
|---|---|---|
| Ordered Quantities | Immediately after the sales order is confirmed | Services, prepaid goods |
| Delivered Quantities | Only after the delivery is validated | Physical products, wholesale |
You set the invoicing policy on each product. In a single sales order, different products can have different policies. Odoo colour-codes the lines to help you see which are ready:

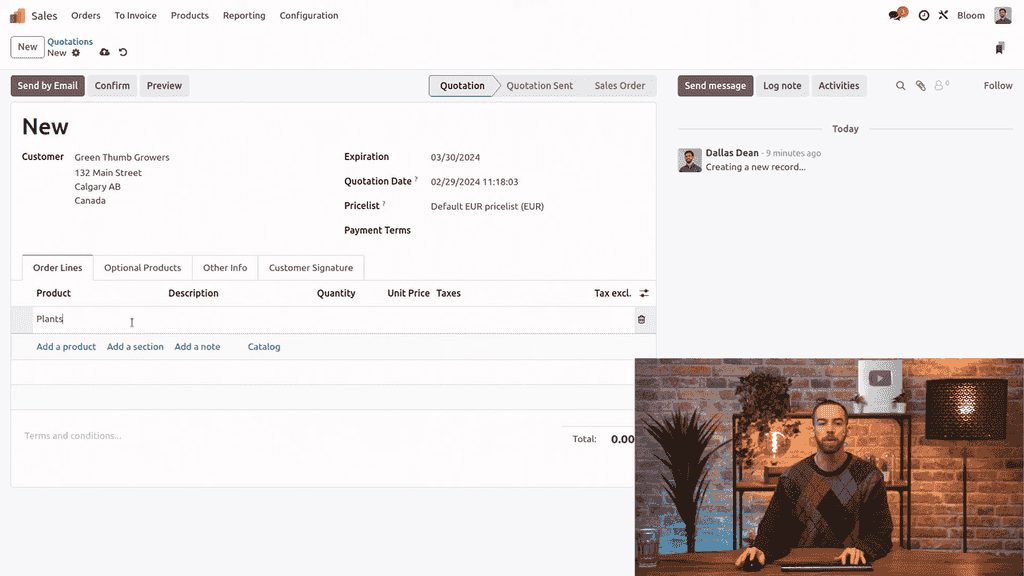
Go to the Sales app and create a new quotation. Add your customer, then add order lines. You can use sections to organize items (e.g., "Plants" and "Supplies") for a cleaner layout.
Once your quotation is ready, click Confirm to turn it into a sales order.
After confirmation, look at the line colours:
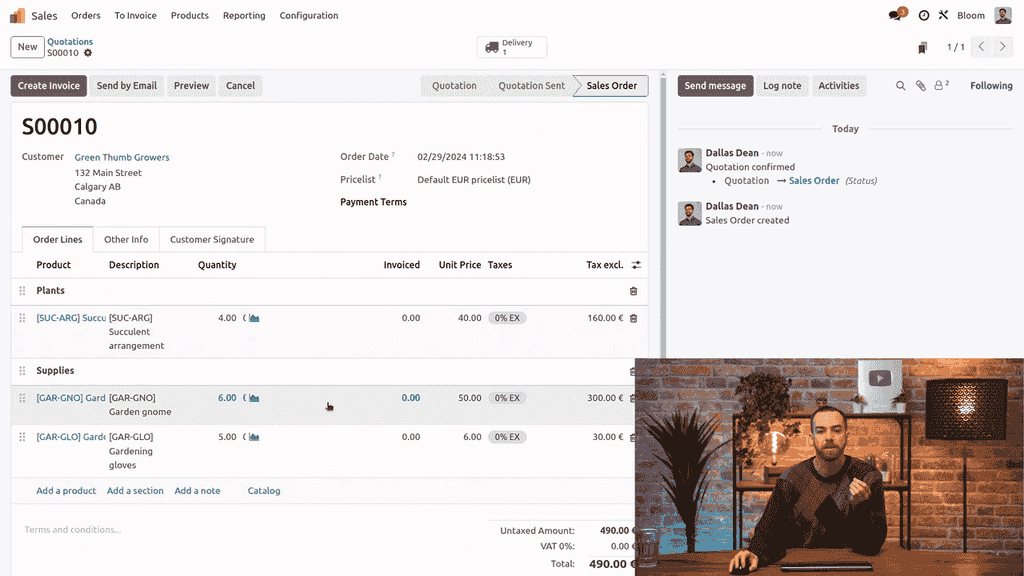
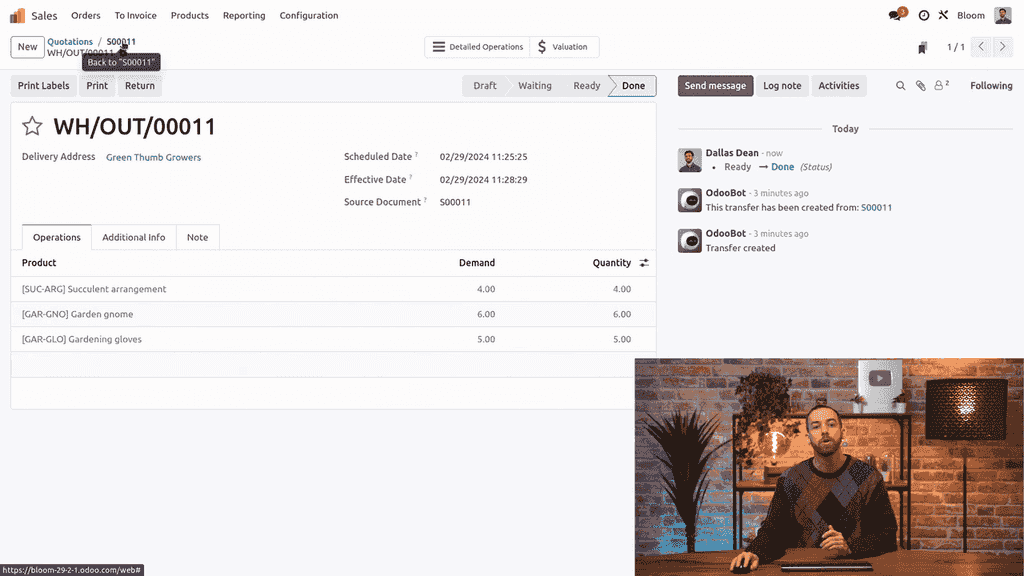
For lines using the Delivered Quantities policy, click the Delivery smart button on the sales order. Validate the delivery order by confirming the quantities shipped. Once validated, go back to the sales order — those lines now appear in blue.

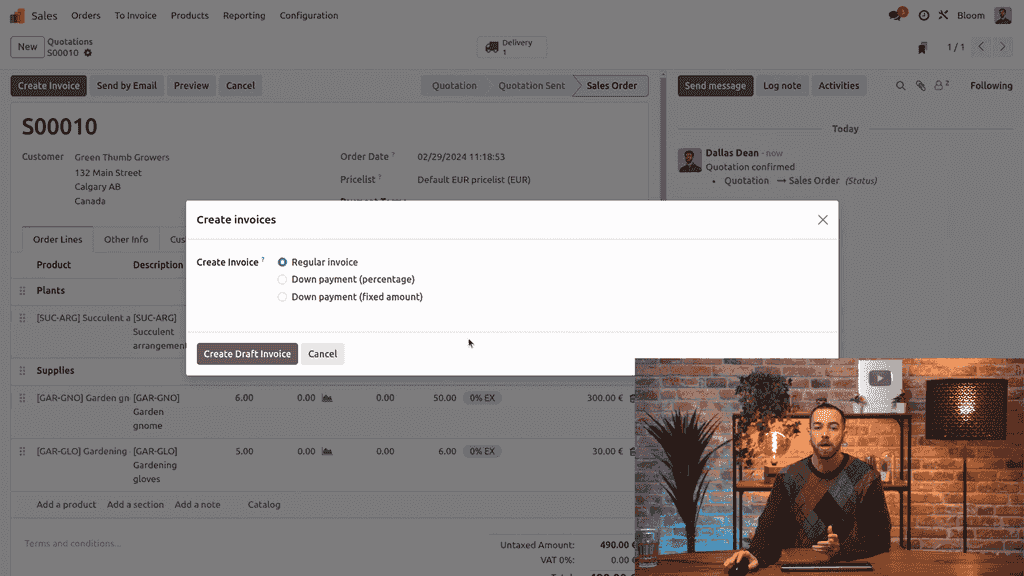
Click Create Invoice on the sales order. Select Regular Invoice to invoice all currently invoiceable lines. Click Create Draft Invoice.
The draft invoice inherits the same section structure from your sales order, keeping everything organized.
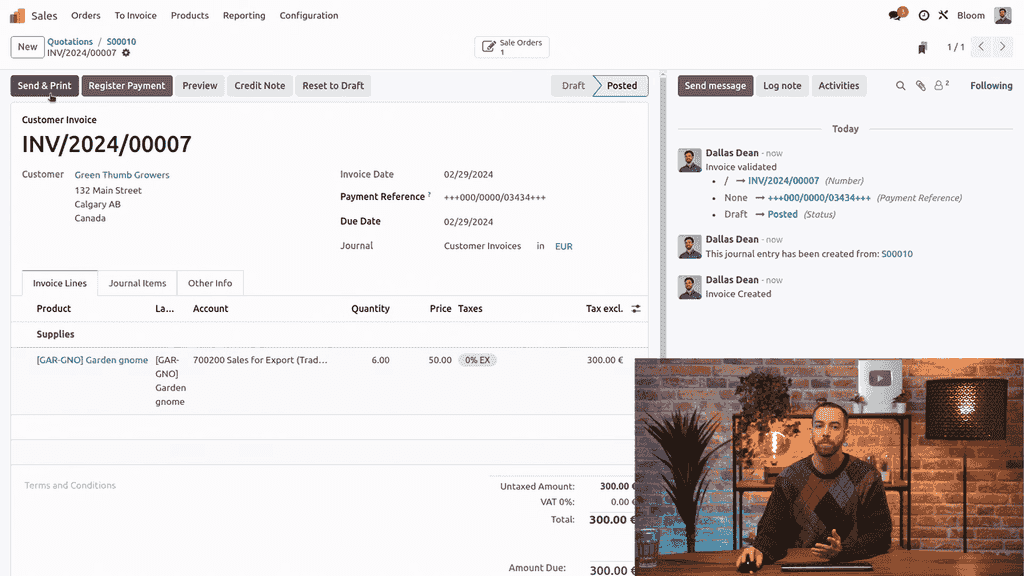
Review the draft invoice and click Confirm to finalize it.
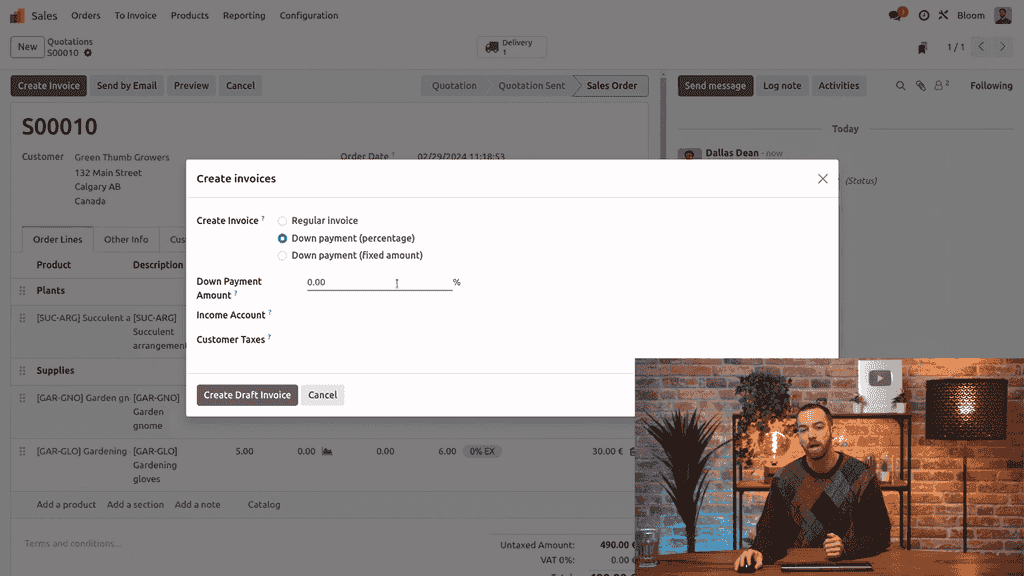
When creating an invoice, Odoo offers three choices:
Down payments are available even when no lines are invoiceable yet, making them useful for collecting deposits before delivery.
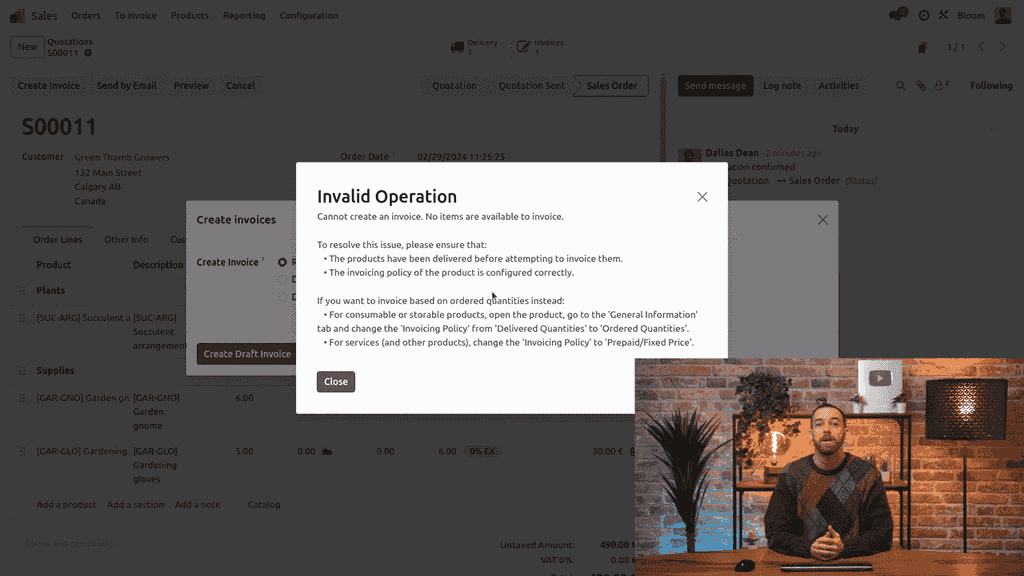
If you try to create a regular invoice when no lines are invoiceable, Odoo returns a clear error message explaining the issue. This is by design — Odoo's error messages tell you exactly what went wrong and how to fix it.
After invoicing all currently invoiceable lines, the remaining option on the sales order is limited to down payments only, until more lines become invoiceable through delivery.
You do not need to invoice sales orders one at a time. To create invoices in bulk:
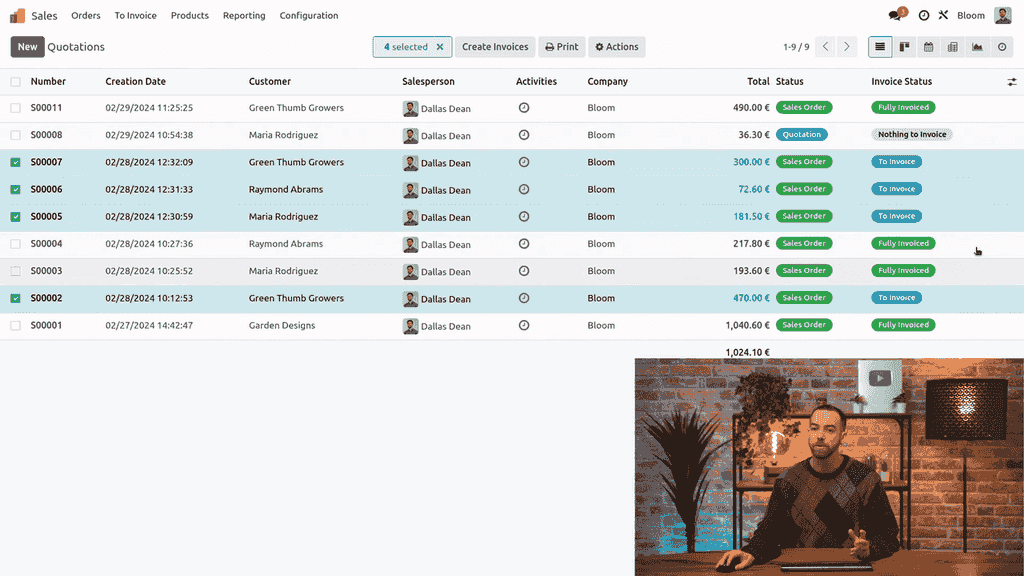
Odoo provides a Consolidated Billing option during bulk creation:
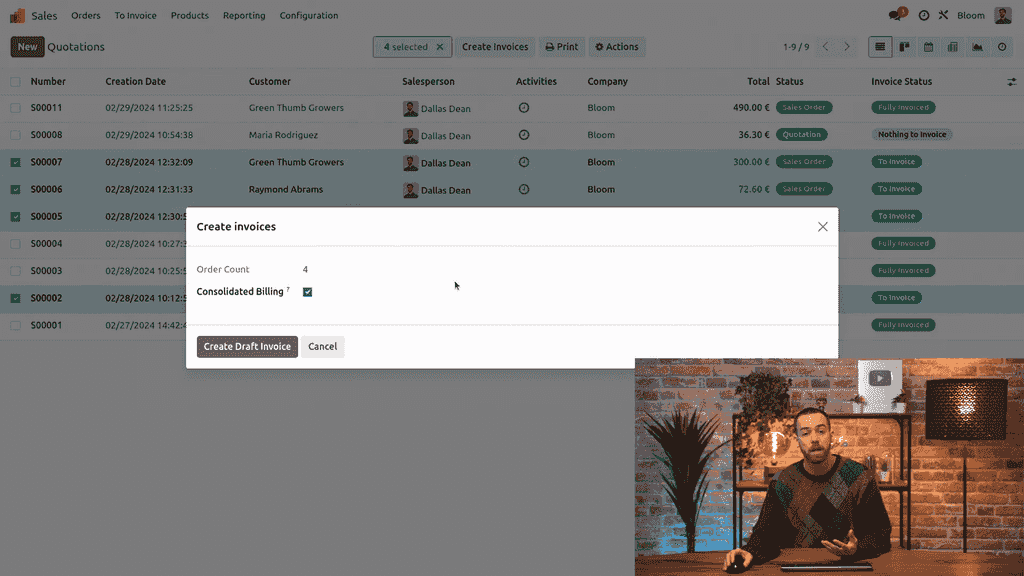
This saves significant time compared to creating invoices individually.

Zoo AI is a certified Odoo partner in Hong Kong, delivering expert ERP implementation and AI automation for SMEs. Get in touch to learn more.