How to Use Odoo Barcode for Receipts and Delivery Orders

How to Use Odoo Barcode for Receipts and Delivery Orders

Yannis, Odoo Expert
5 min read

Table of Contents

Why Use Barcode Scanning in Odoo Inventory

Processing receipts and delivery orders manually in Odoo works, but it is slow. The Odoo Barcode module lets warehouse staff scan products and trigger actions like validation directly from a barcode scanner — reducing a multi-click process to a few quick scans.

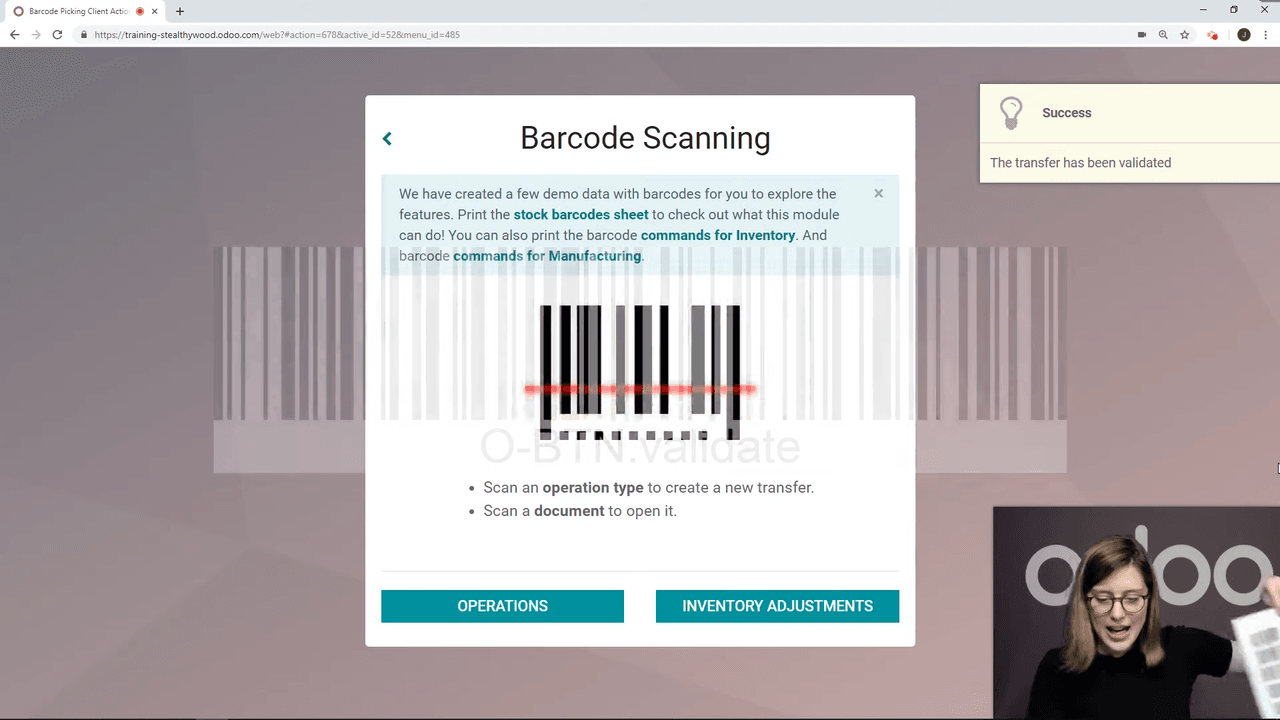
Barcodes in Odoo are not limited to identifying products. They can also trigger operations such as validate, discard, and cancel, making the entire warehouse workflow hands-free.

Barcode actions triggering validate, discard, and cancel operations

Setting Up the Barcode Module

Before scanning anything, you need to install and configure the Barcode module.

Step 1: Install the Barcode App

Go to Apps and search for "Barcode." Install the module if it is not already active.

Apps module with Barcode app ready to install

Step 2: Enable Barcode Scanners

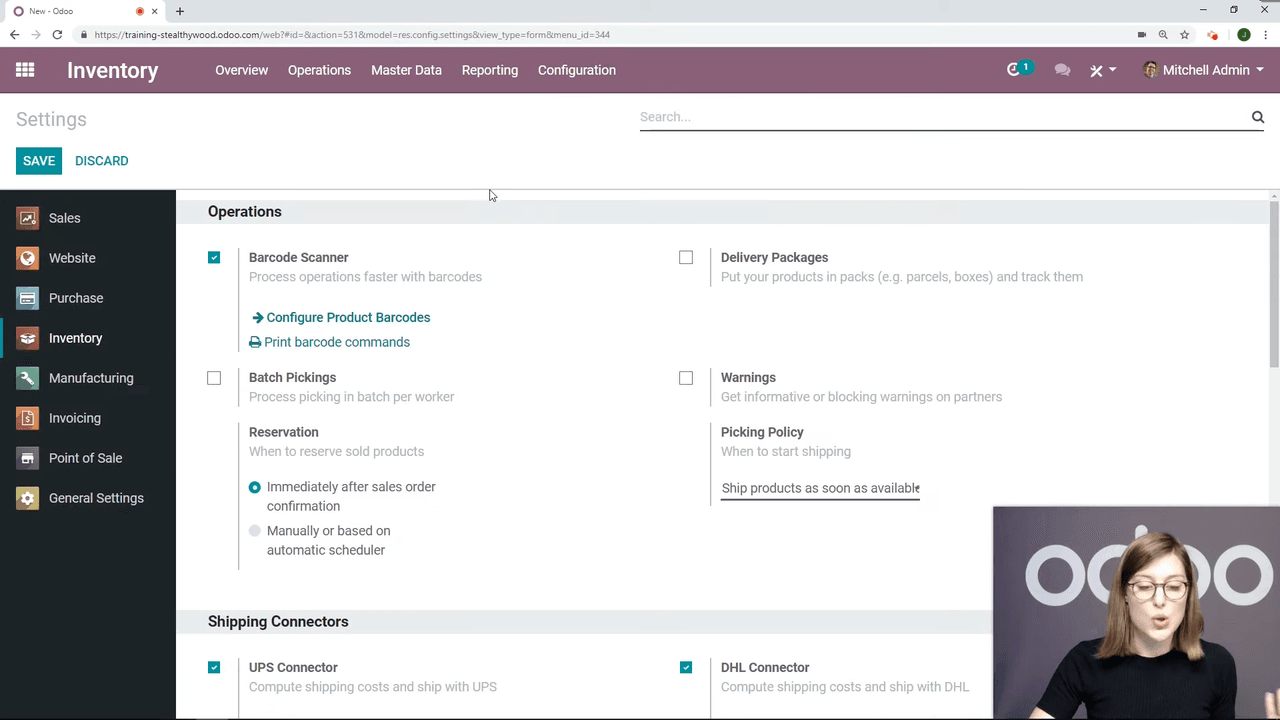
Navigate to Inventory > Configuration > Settings. Under the Barcode section, activate the option to use barcode scanners. Click Save.

Inventory settings with barcode scanner option activated

Step 3: Print Barcode Commands

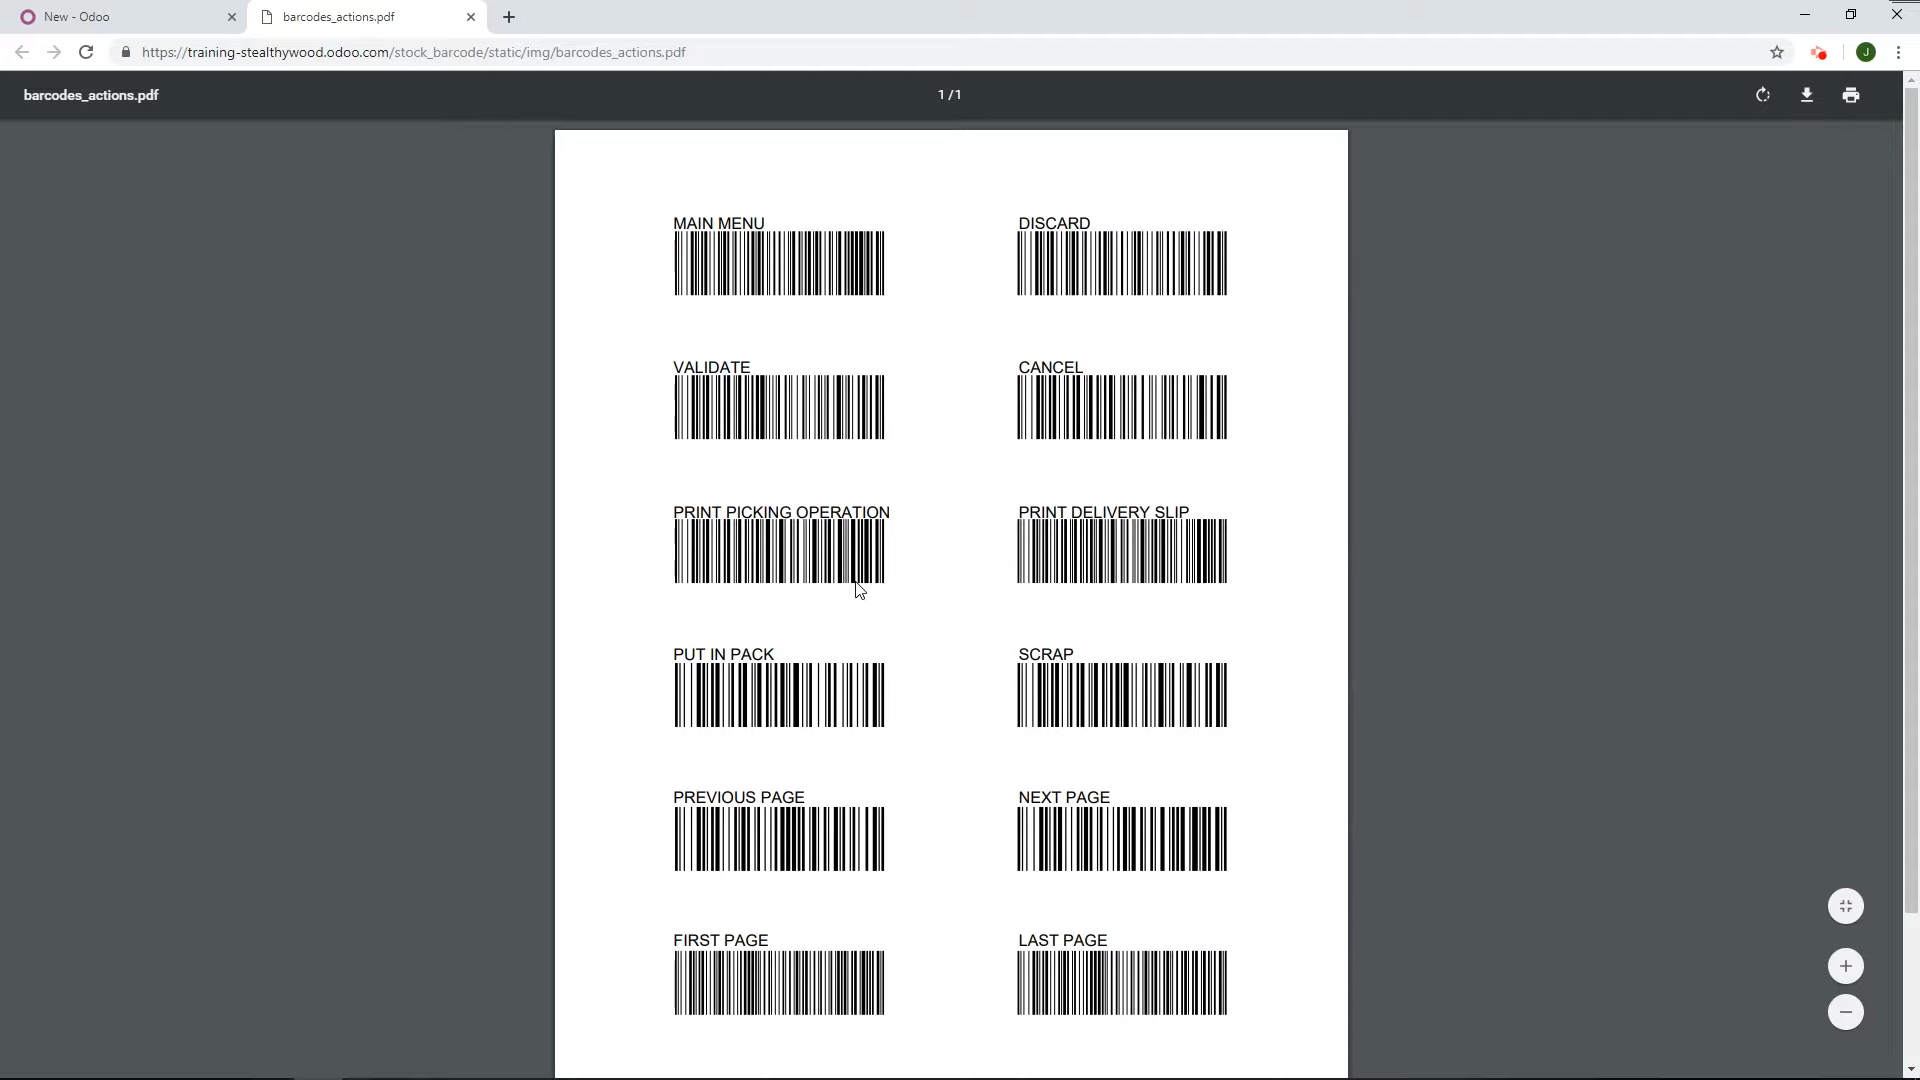
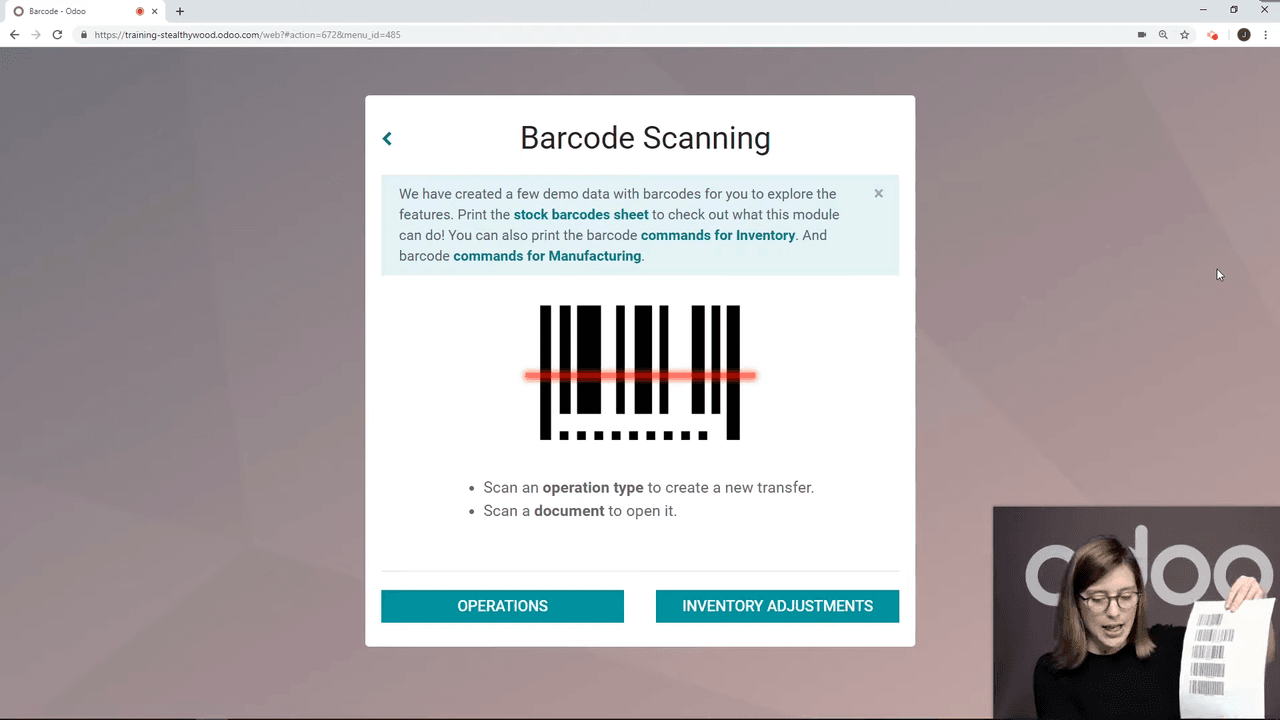
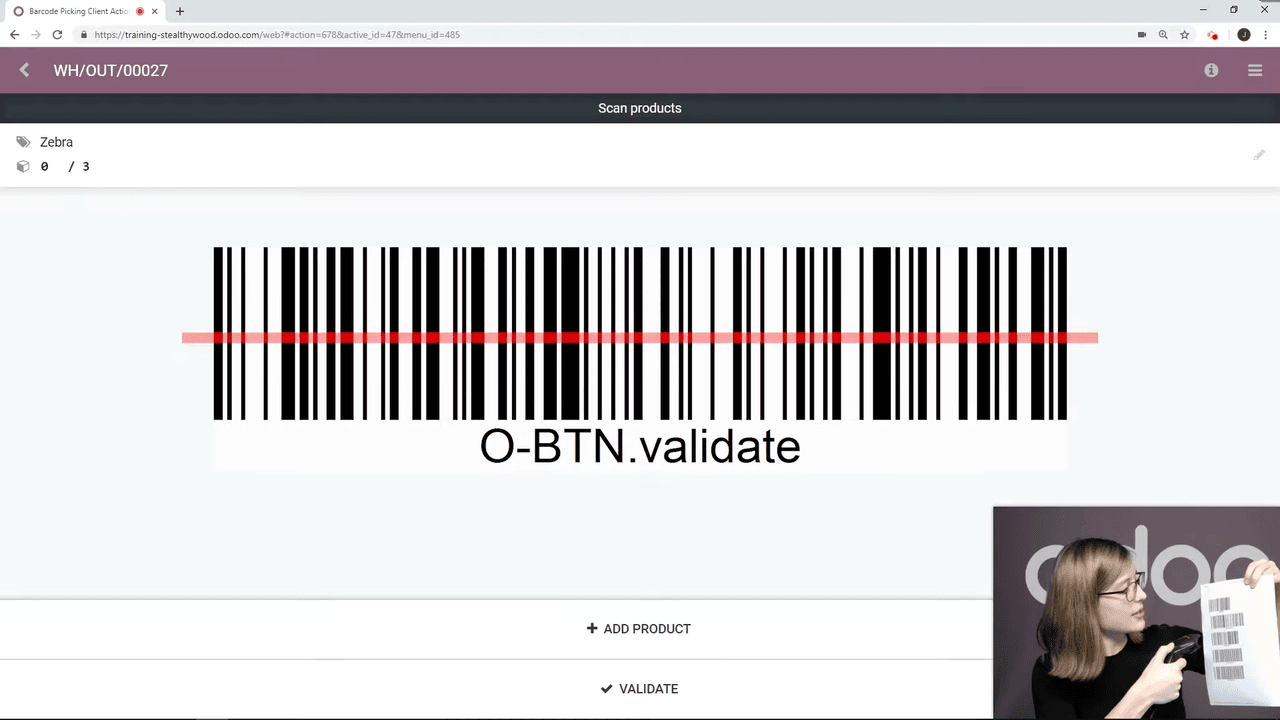
Still in Settings, click Print Barcode Commands. This generates a PDF containing action barcodes:

  • Validate — confirms the current operation
  • Discard — cancels changes
  • Cancel — aborts the operation

Print this sheet and keep it at your packing station for quick access.

PDF with printed barcode commands showing validate, discard, and cancel actions

How Operation Type Barcodes Work

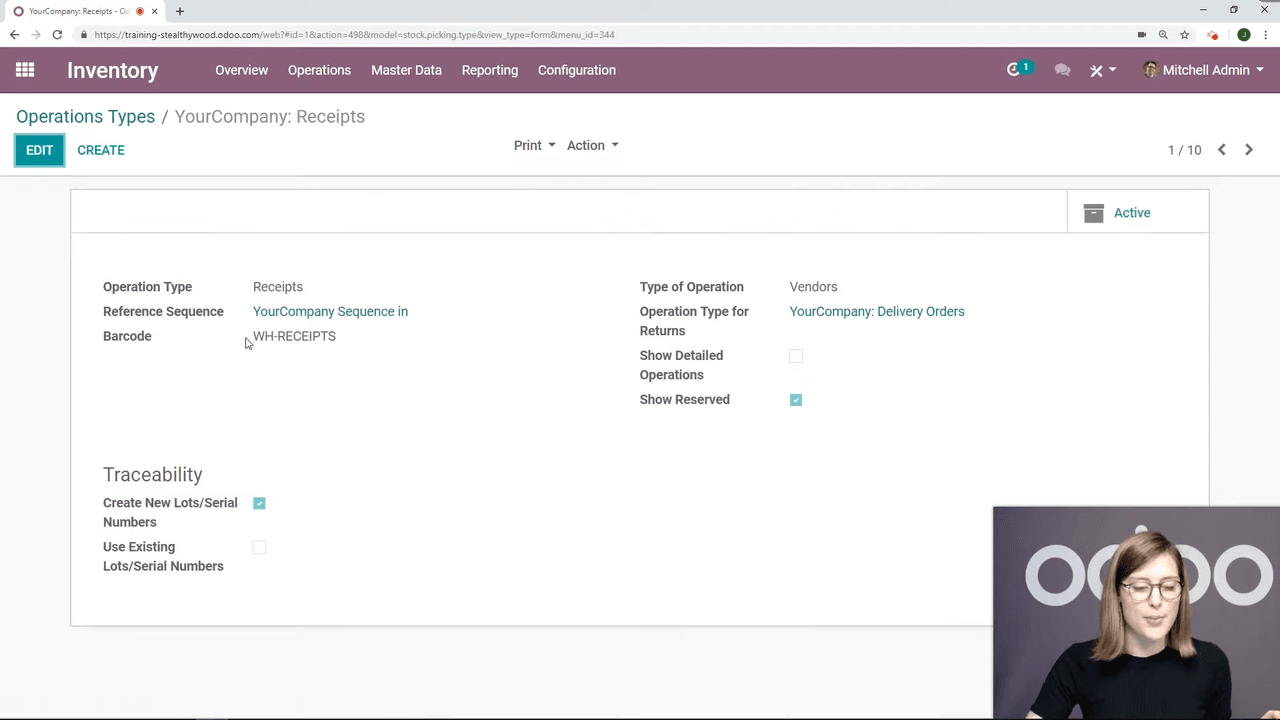
Odoo automatically generates a barcode for each operation type in your warehouse:

Operation TypeExample Barcode Label
ReceiptsWH-RECEIPTS
Delivery OrdersWH-DELIVERY
Internal TransfersWH-INTERNAL

You can view these under Inventory > Configuration > Operation Types. Each operation type has its own barcode that, when scanned, opens that operation in the Barcode app.

Operation Types configuration showing barcodes for receipts, delivery, and internal transfers

Receiving a Purchase Order with Barcode

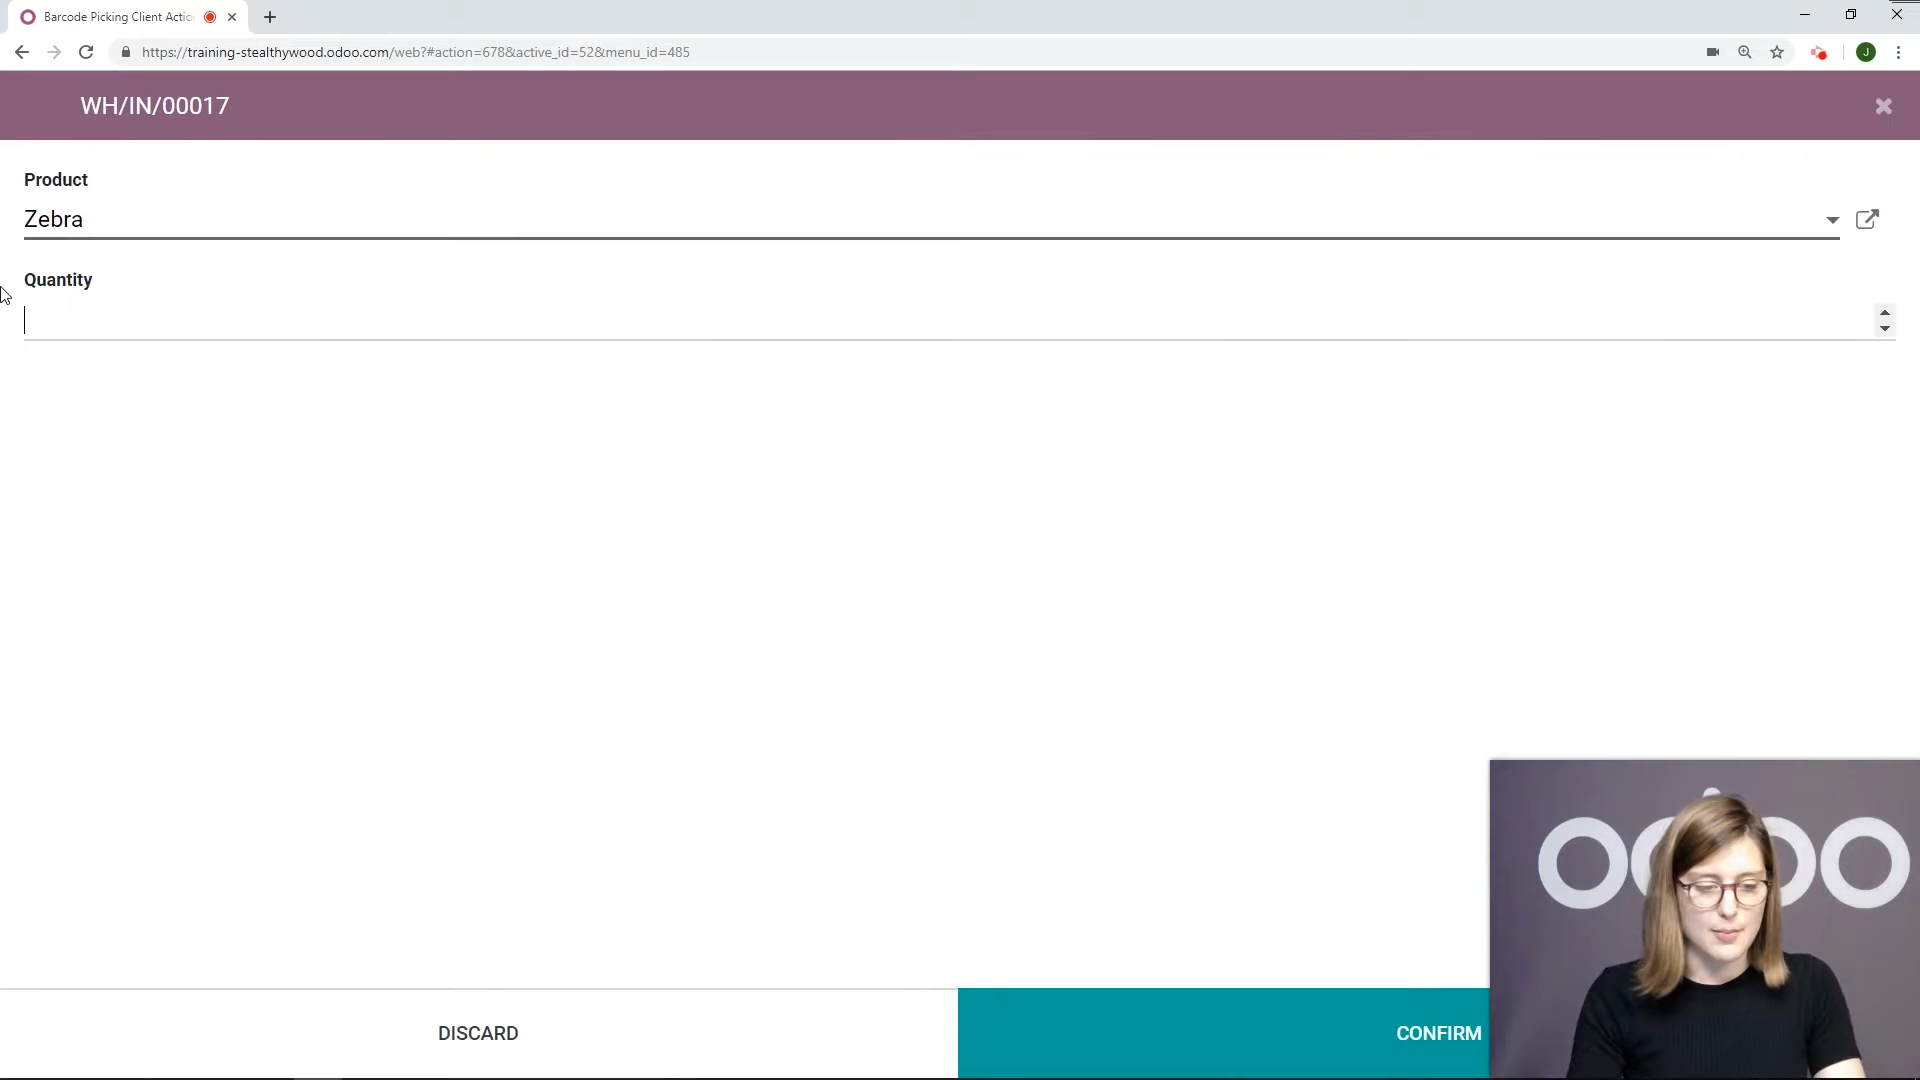
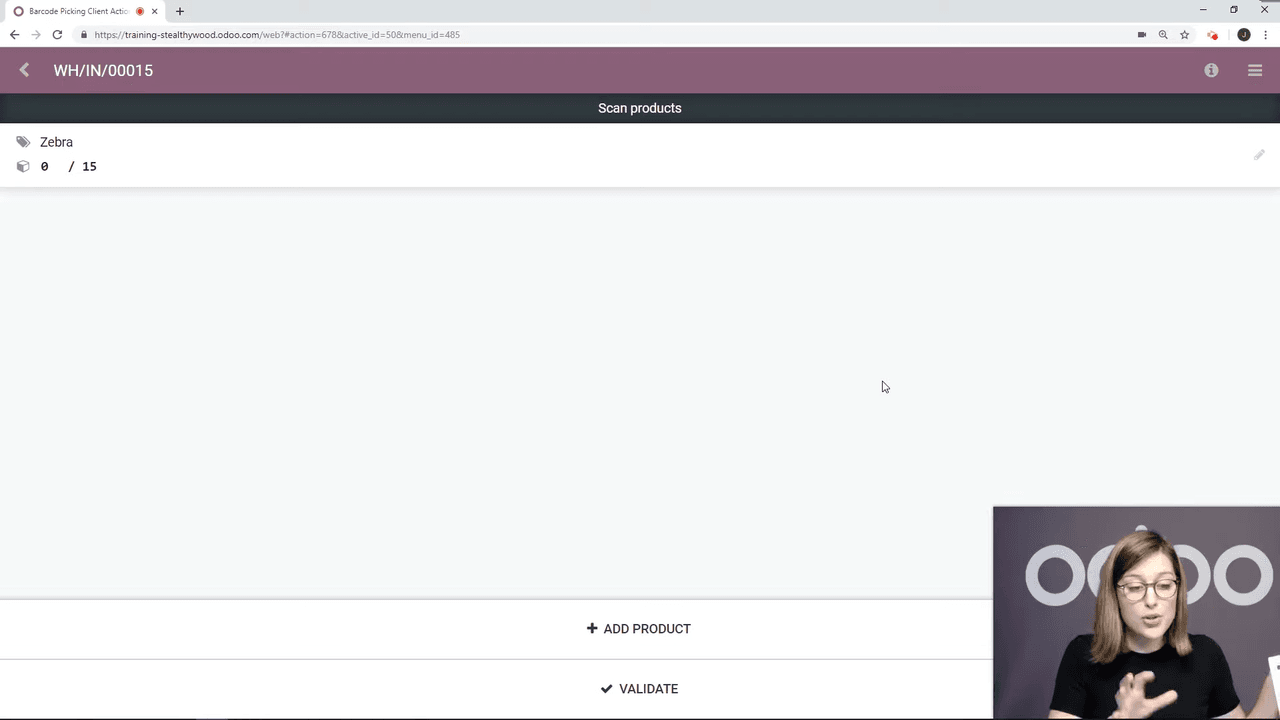
Here is the step-by-step flow for receiving goods using the barcode scanner.

Create the Receipt

  1. Open the Barcode app
  2. Scan the Warehouse Receipts operation barcode
  3. A new receipt opens, ready for product scanning

Barcode app with warehouse receipts operation scanned

Scan Products

  1. Scan the product barcode (e.g., product "Zebra")
  2. Adjust the quantity if needed (e.g., change to 20 units)
  3. Confirm the quantity

Product Zebra scanned with quantity set to 20

Validate the Receipt

  1. Scan the Validate action barcode
  2. The transfer is validated immediately
  3. A confirmation message appears: "The transfer has been validated"

Transfer validated confirmation message

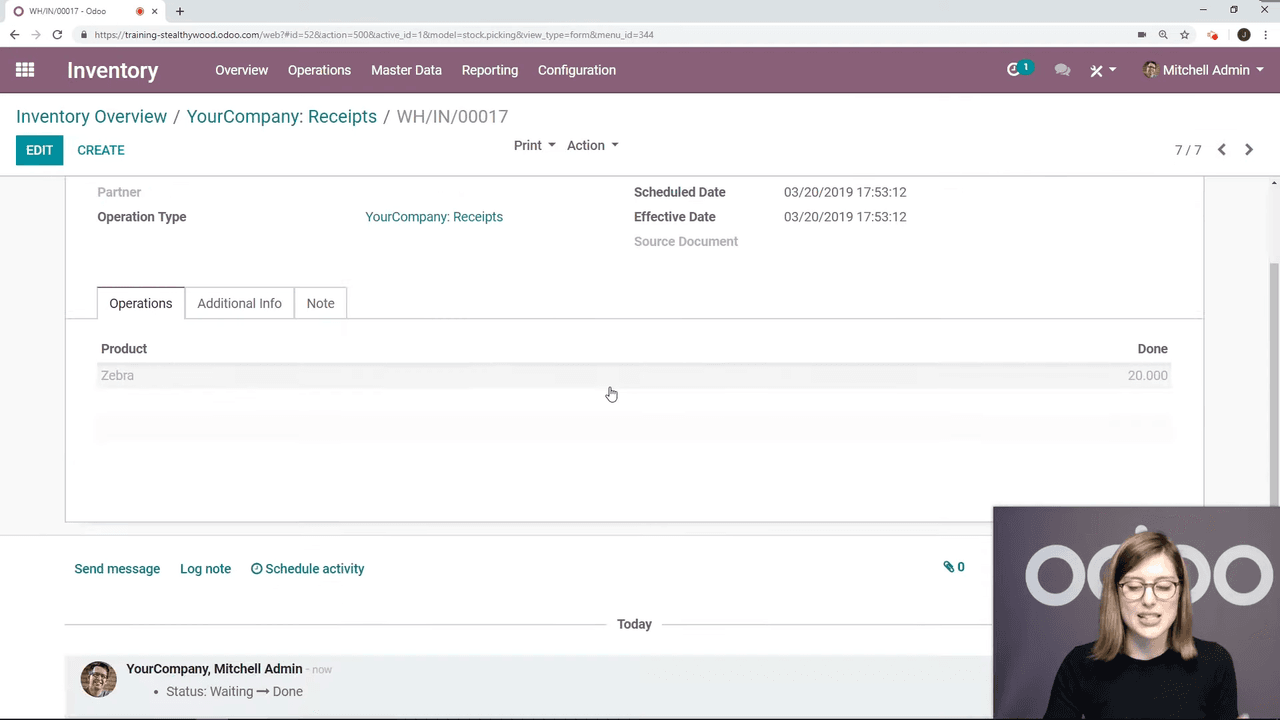
You can verify the receipt under Inventory > Receipts — the new receipt will show as "Done."

Inventory receipts list showing validated receipt with Done status

Processing a Purchase Order Receipt

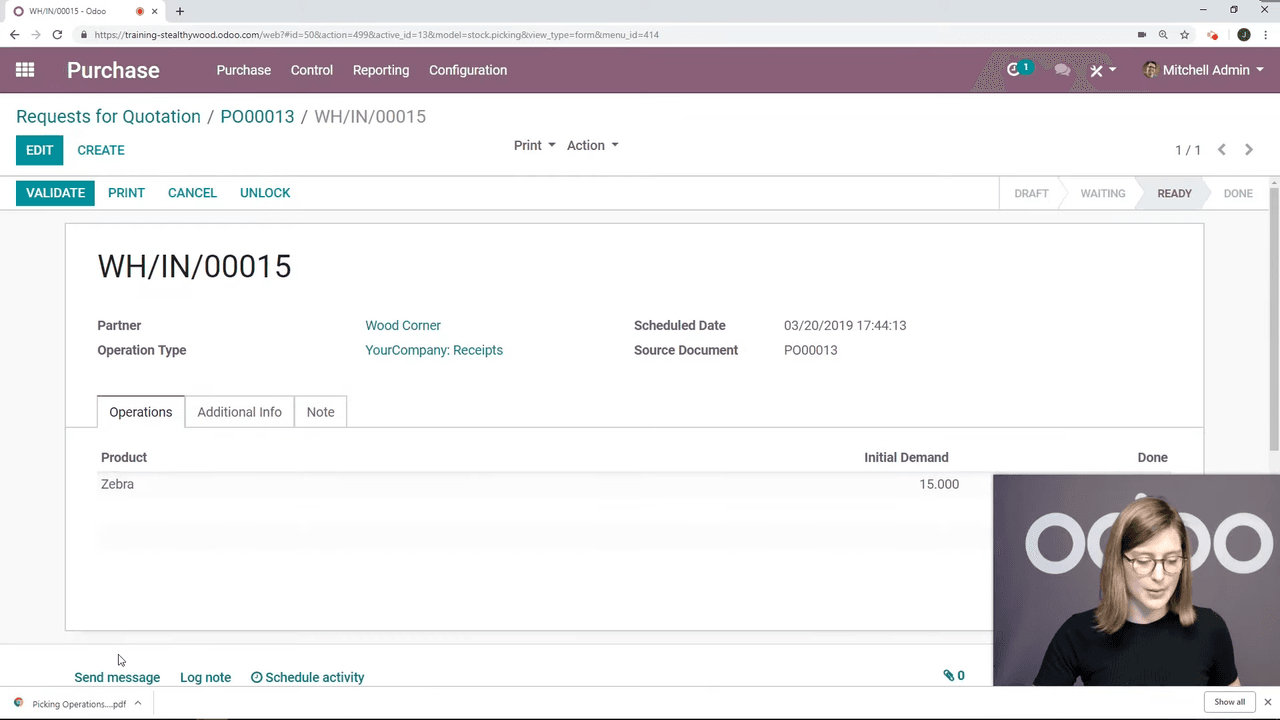
If you created a purchase order through the Purchase app, you can still validate the receipt via barcode:

  1. Open the purchase order and go to the receipt
  2. Click Print Picking Operations to generate a PDF with the order's barcode
  3. Open the Barcode app
  4. Scan the picking operation barcode — the receipt appears
  5. Scan the Validate action barcode
  6. If no quantities were manually recorded, Odoo applies the reserved quantities automatically
  7. Click Apply on the confirmation popup

Purchase order receipt with picking operation PDF barcode

Barcode app showing purchase order receipt after scanning

Apply reserved quantities confirmation popup

Validating a Delivery Order from Sales

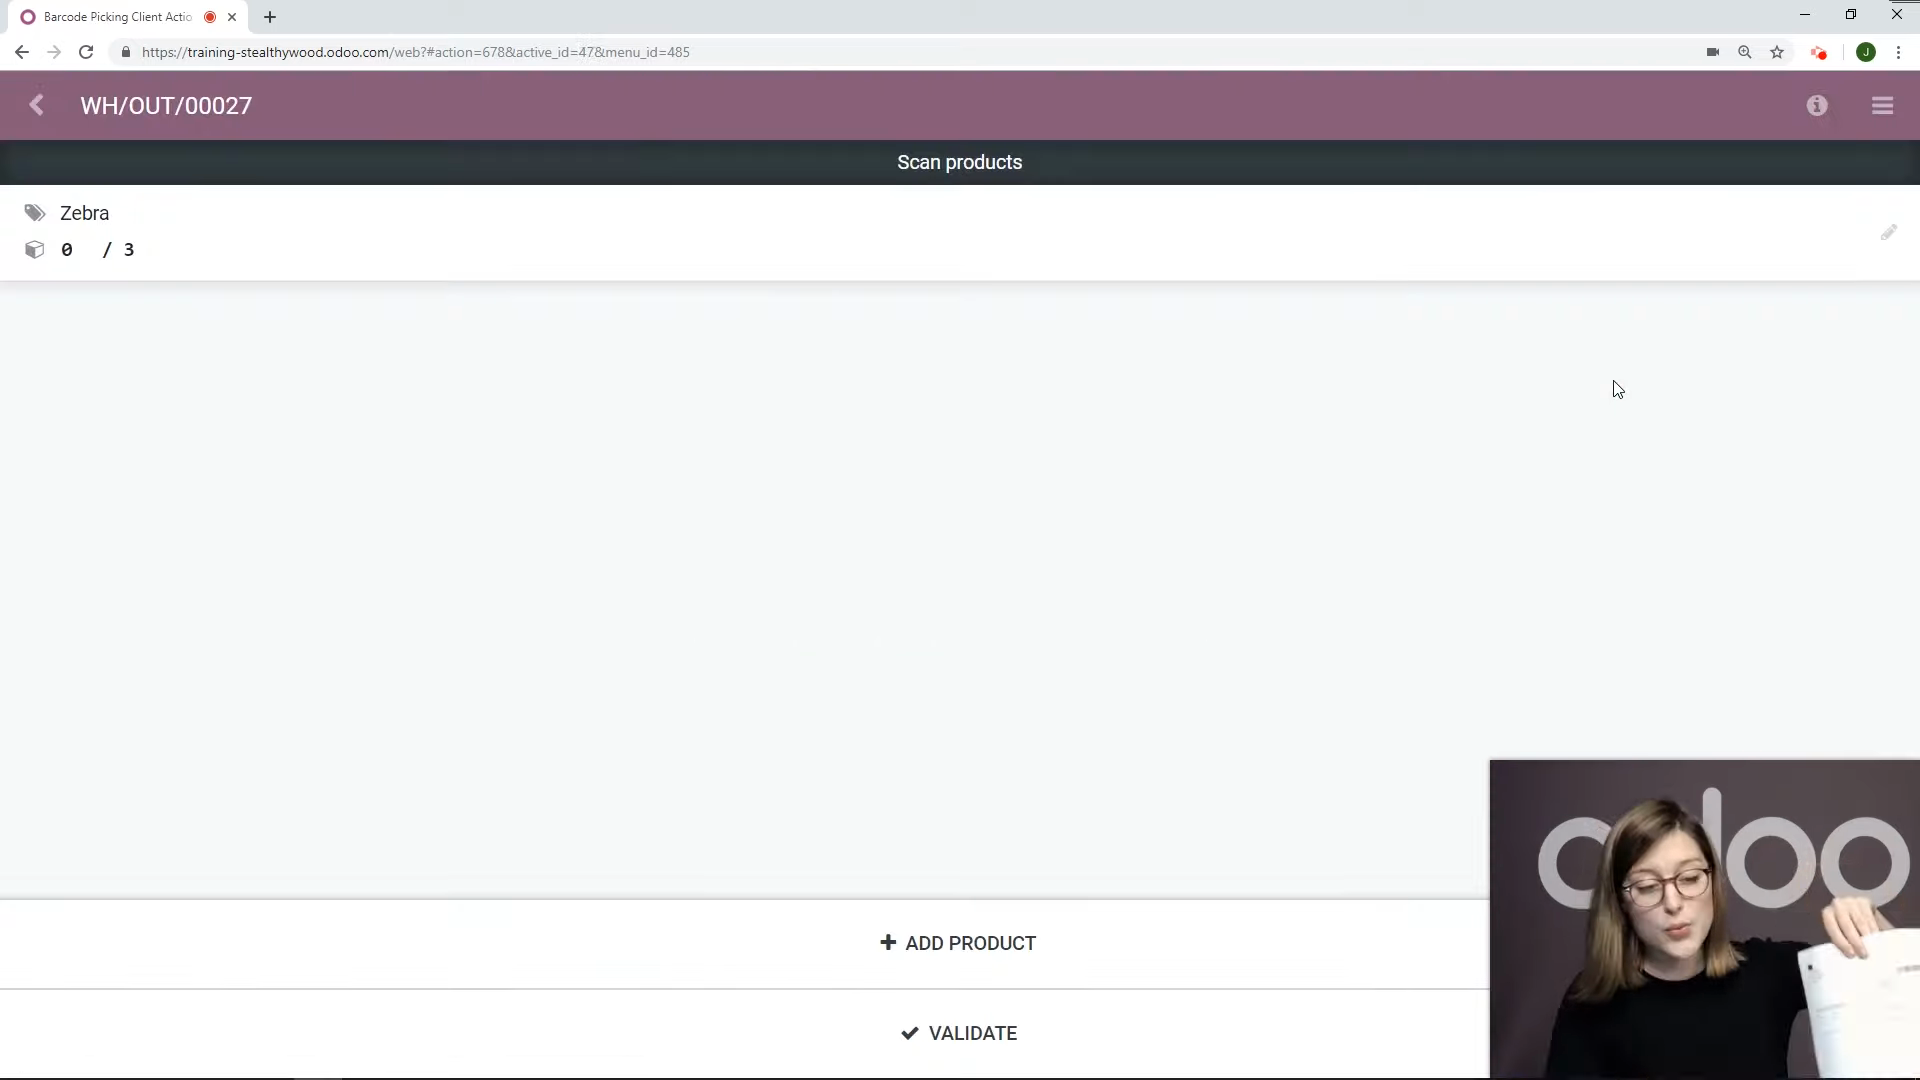
The same workflow applies to outbound shipments:

  1. Create a sales order and confirm it
  2. Go to the delivery order and click Print Picking Operations
  3. Open the Barcode app
  4. Scan the picking operation barcode
  5. Review the product details and quantities
  6. Scan the Validate action barcode
  7. Confirm the transfer

Delivery order details showing product and quantity in barcode app

Delivery order validated after scanning validate barcode

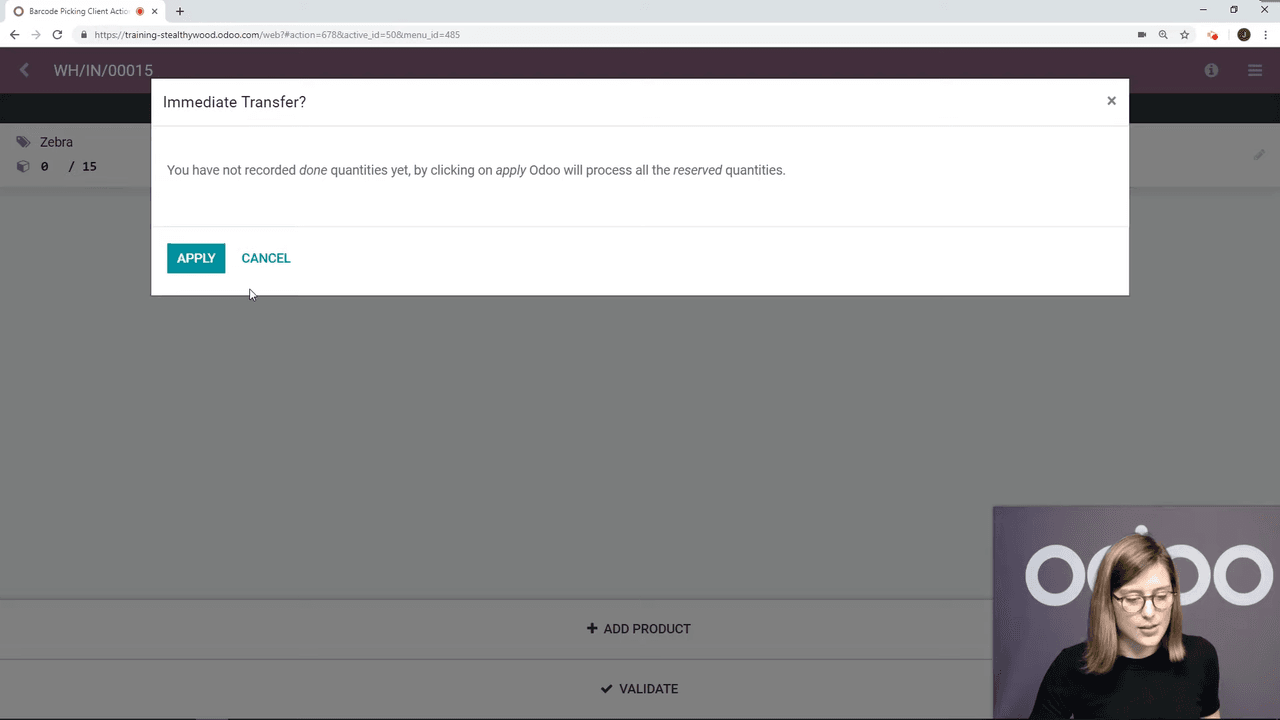
If done quantities are already recorded, the validation happens without any popup.

Tips for a Smooth Barcode Workflow

  • Print and organize your barcode sheets. Keep action barcodes (Validate, Discard) at every workstation.
  • Use picking operation PDFs. Each purchase or sales order can generate its own scannable barcode — no need to search for orders manually.
  • Record done quantities when possible. This eliminates the confirmation popup during validation.
  • Configure your scanner correctly. Ensure it is recognized by your browser or Odoo instance before going live.

Next Steps

If you handle high volumes of receipts and deliveries, the Barcode module is one of the simplest ways to speed up operations. Start by installing the module, printing your action barcodes, and running a test receipt to get comfortable with the flow.

For more advanced setups, explore multi-step routes (e.g., pick-pack-ship) combined with barcode scanning for even greater efficiency.


References

Tags

OdooBarcodeInventoryWarehouseReceiptsDelivery
Professional businesswoman working with data and analytics in modern office environment

Need Help with Odoo Implementation in Hong Kong?

Zoo AI is a certified Odoo partner in Hong Kong, delivering expert ERP implementation and AI automation for SMEs. Get in touch to learn more.