How to Register Vendor Bills in Odoo Accounting

How to Register Vendor Bills in Odoo Accounting

Yannis, Odoo Expert
4 min read

Table of Contents

Why Vendor Bill Management Matters

Registering vendor bills is one of the most repetitive yet essential tasks for any business. Missing a bill means late payments, strained vendor relationships, and messy books.

Odoo Accounting offers multiple ways to register vendor bills — from fully automatic to manual entry — so you can pick the method that fits your workflow. This guide walks through all four approaches.

Method 1: Create a Bill from a Purchase Order

Purchase order with Ready to Bill status

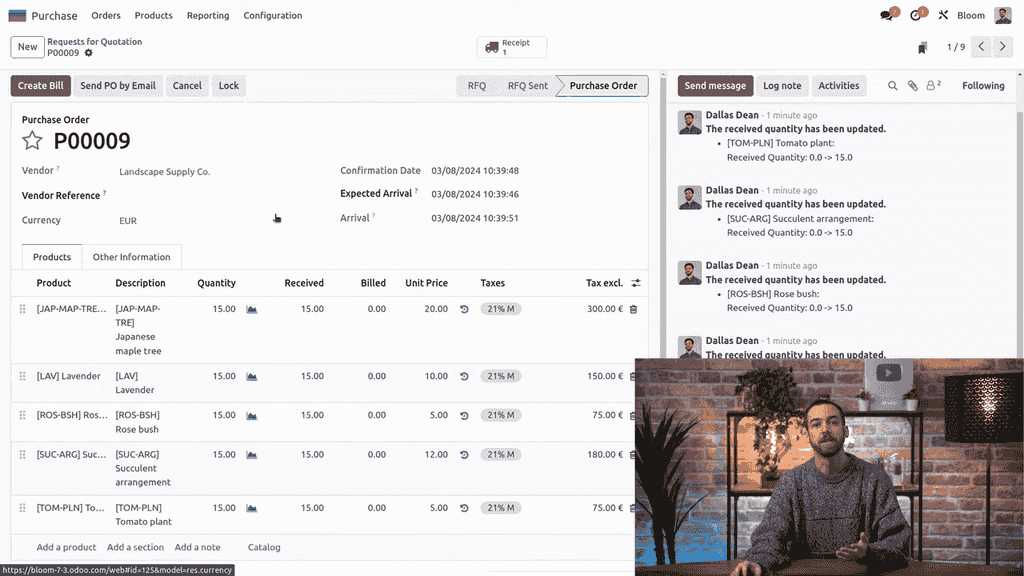
If you already have a confirmed purchase order in Odoo, this is the fastest route.

  1. Open the purchase order (it should show a Ready to Bill status)
  2. Click the Create Bill button

Create Bill button on purchase order

  1. Odoo automatically populates the vendor, order lines, and all related information

Vendor bill auto-populated from purchase order

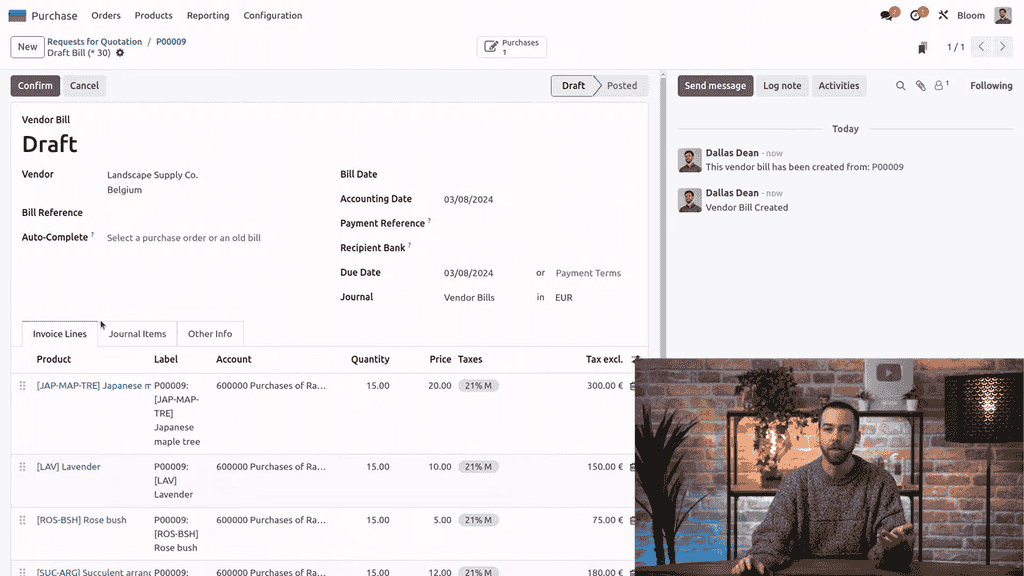
No retyping. No copy-paste errors. The bill is linked directly to the purchase order for full traceability.

Pro tip: You can select multiple purchase orders from the same vendor to create one consolidated bill.

Method 2: Create a Bill Manually from the Dashboard

When you need to enter a bill that is not tied to a purchase order:

  1. Go to Accounting > Dashboard

Accounting dashboard with Vendor Bills journal

  1. In the Vendor Bills journal, click Create
  2. Fill in the vendor, bill details, and line items

Autocomplete feature suggesting purchase order data

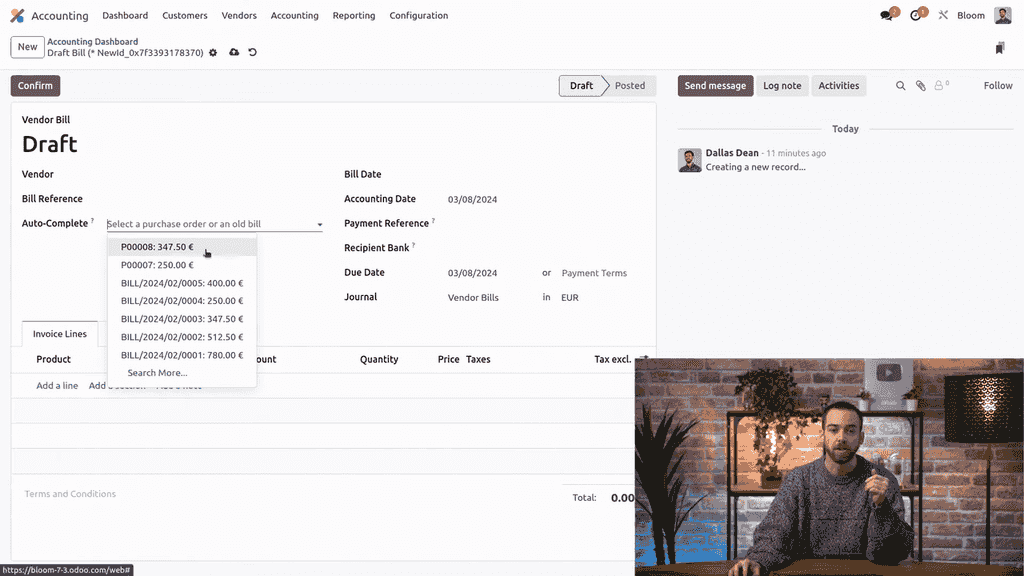
Odoo includes an autocomplete feature — start typing a vendor or reference, and it pulls in matching purchase order data automatically. This saves time even on manual entries.

Method 3: Upload a PDF Bill

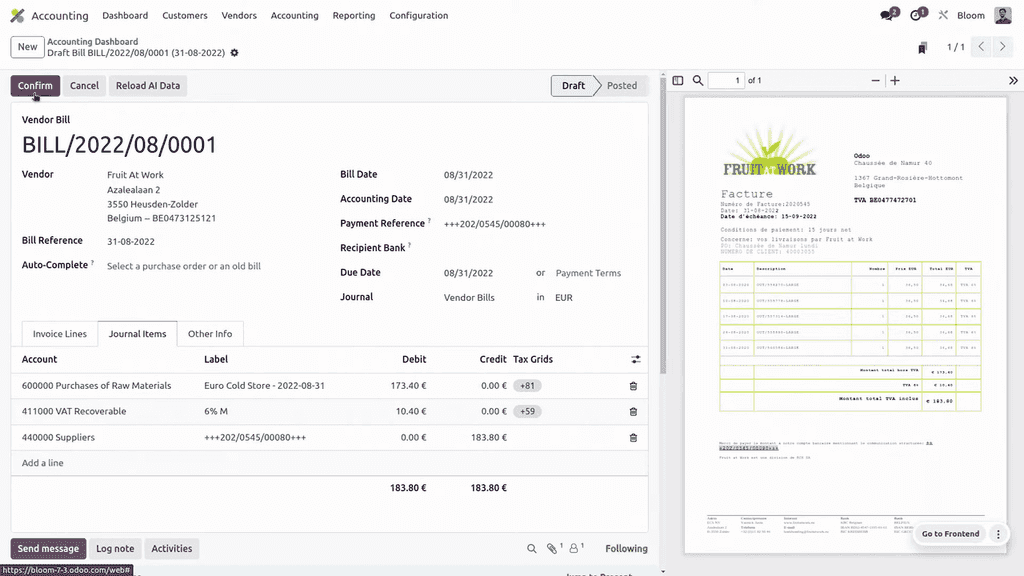
This is the standout feature for teams that receive PDF invoices from vendors.

  1. From the Accounting Dashboard, click the Upload button on the Vendor Bills journal

Upload button on Vendor Bills journal

  1. Select the PDF file and open it
  2. Odoo's document digitization tool reads the PDF and auto-fills the bill form

PDF bill auto-recognized with digitization tool

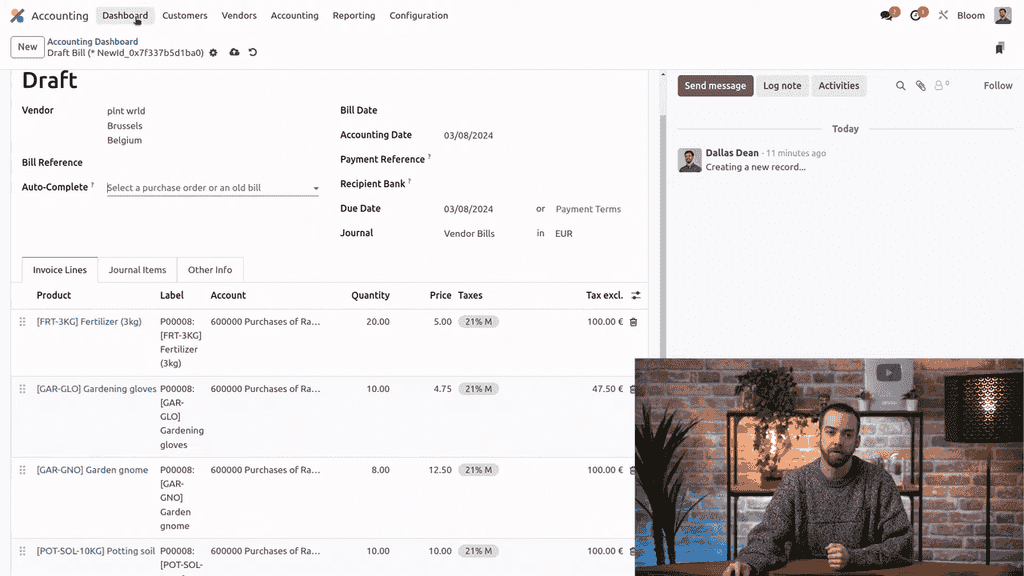
The system recognizes vendor details, line items, quantities, prices, and taxes. You can review and edit anything before confirming.

Method 4: Receive Bills via Email Alias

For hands-free bill collection, set up an email alias so vendors can send bills directly to your Odoo database.

  1. Go to Accounting > Dashboard
  2. On the Vendor Bills journal, click the three dots and open Configuration

Vendor Bills journal configuration menu

  1. Under Advanced Settings, set your Email Alias

Email alias configuration in advanced settings

Bills sent to that address appear automatically on your dashboard — no manual upload needed.

Understanding Bill Dates and Fiscal Periods

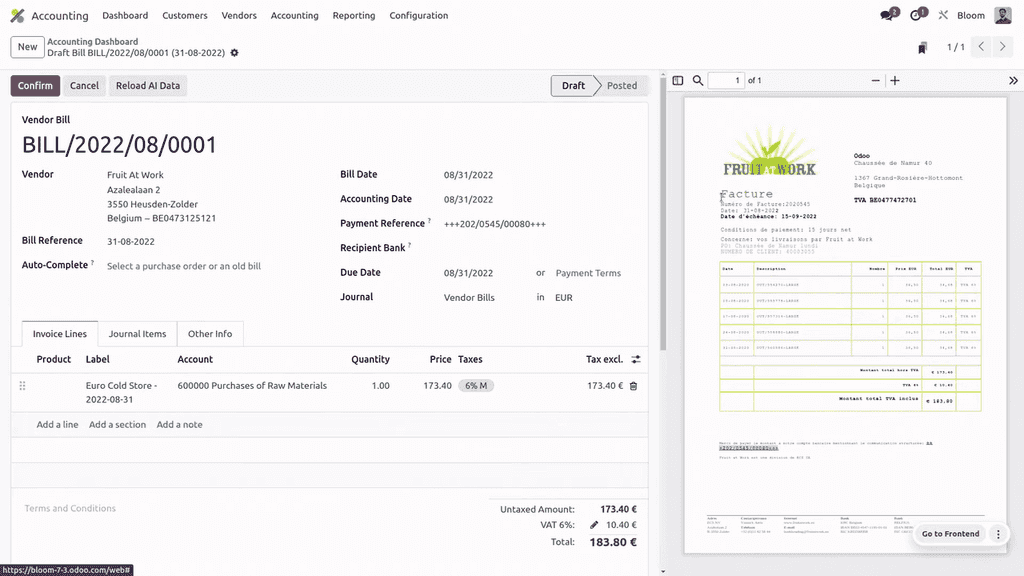
Each vendor bill in Odoo has two important dates:

DatePurpose
Bill DateThe date the vendor issued the bill
Accounting DateThe date the journal entry is posted

Bill date and accounting date fields on vendor bill

If your accounting date falls within a locked fiscal period, Odoo automatically adjusts it to the first available date after the lock date. This prevents posting errors while keeping your bill date accurate.

Confirming and Paying a Bill

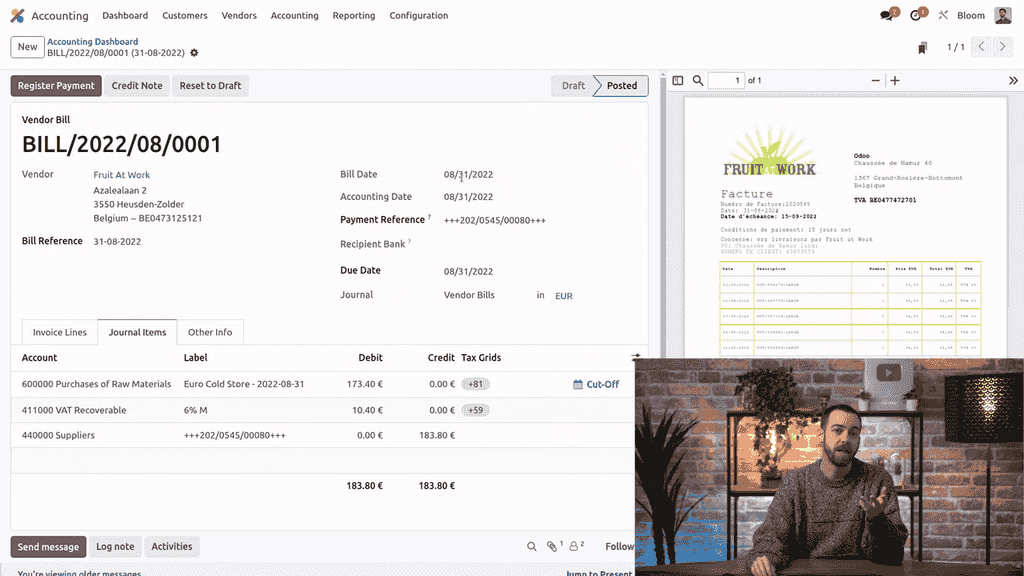
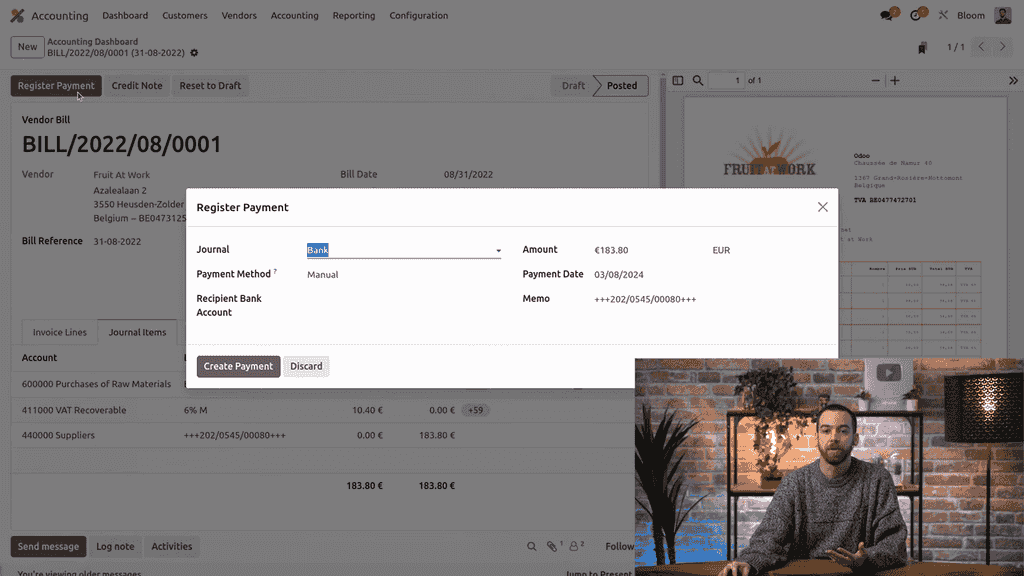
Once you have reviewed the bill:

  1. Click Save, then Confirm — the bill is now posted and assigned a sequence number

Confirmed vendor bill with sequence number

  1. Click Register Payment, enter payment details, and click Create

Register payment dialog

  1. The bill status changes to In Payment

Bill status showing In Payment

  1. After you record the bank transaction and reconcile, the status changes to Paid

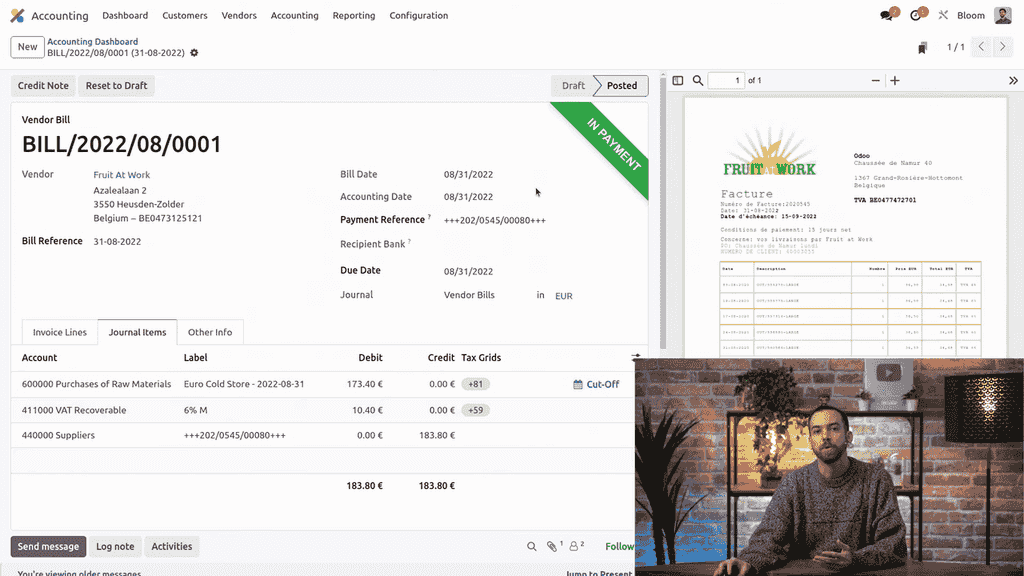
Need to make corrections? Even after confirmation, you can Reset to Draft and cancel if necessary.

Monitoring Your Bills

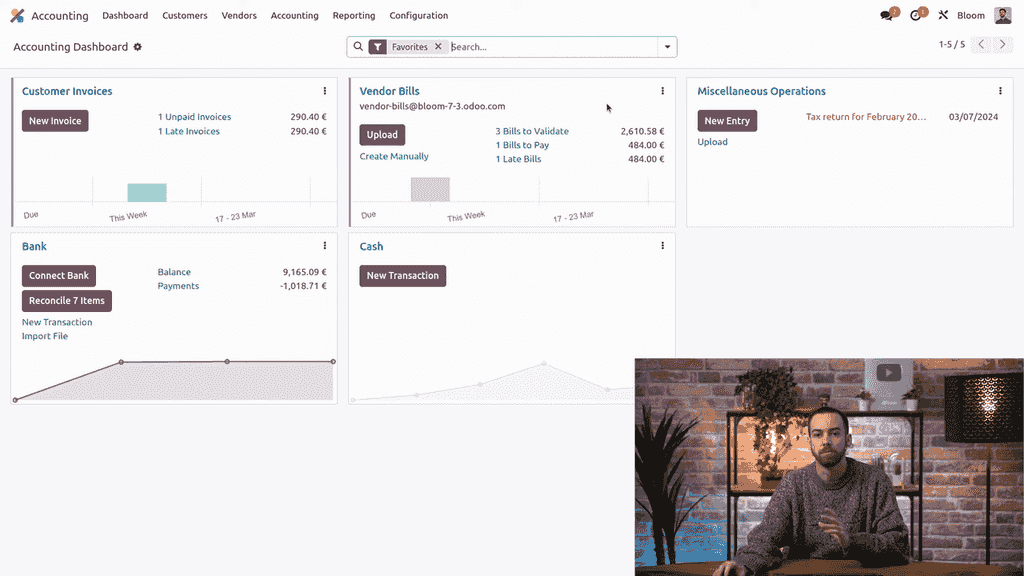
Odoo provides built-in reports to stay on top of your payables:

Bills analysis and aged payables menu options

  • Bills Analysis — breakdown of your vendor bills by status, vendor, and period
  • Aged Payables — see which bills are overdue and by how long

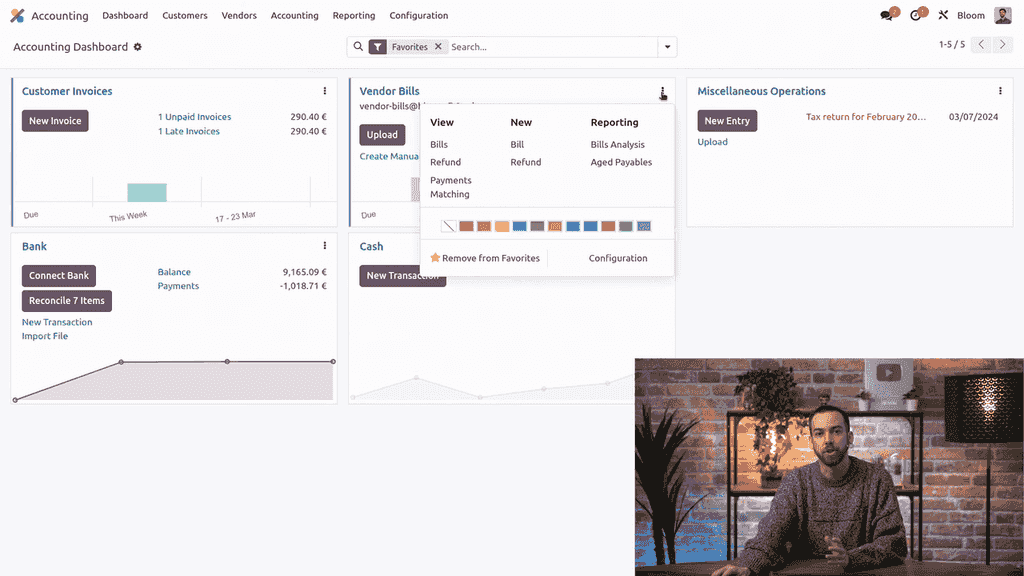
Access both from the Accounting Dashboard by clicking the three dots on the Vendor Bills journal.

Next Steps

  • Set up your email alias to automate bill collection
  • Try the PDF upload feature with your next vendor invoice
  • Review your aged payables report weekly to avoid late payments

References

Tags

OdooAccountingVendor BillsPurchase OrdersAccounts Payable
Professional businesswoman working with data and analytics in modern office environment

Need Help with Odoo Implementation in Hong Kong?

Zoo AI is a certified Odoo partner in Hong Kong, delivering expert ERP implementation and AI automation for SMEs. Get in touch to learn more.